Daily Call Report
After authenthication of user id & password, system will load all basic setups and data into your mobile.
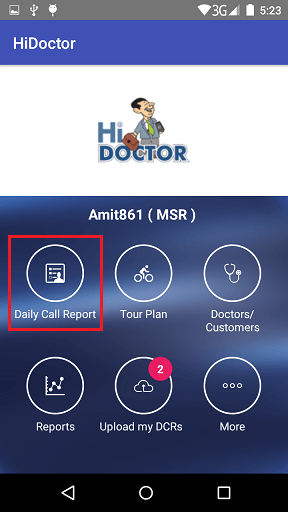
Main Menu will be loaded, for DCR entry click on Daily call Report Icon
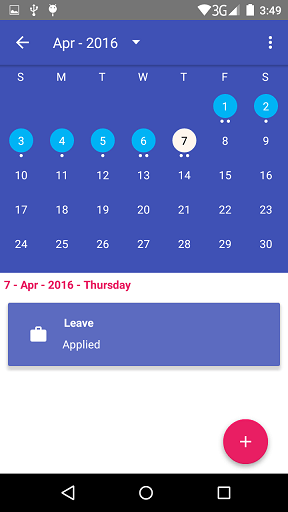
On click of Daily Call Report, DCR calendar will get loaded.
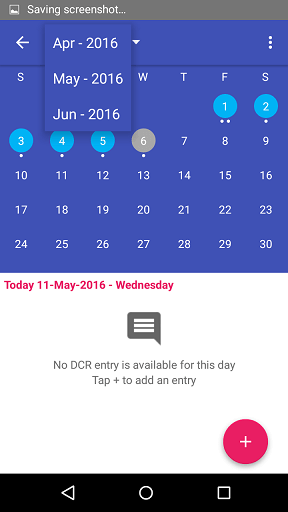
Calendar will be displayed for 3 months, user can navigate by sliding the screens or just by selecting
Current date will be highlighted for you.
Click on the date for which DCR entry needed
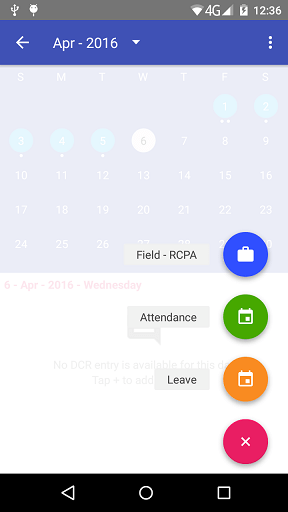
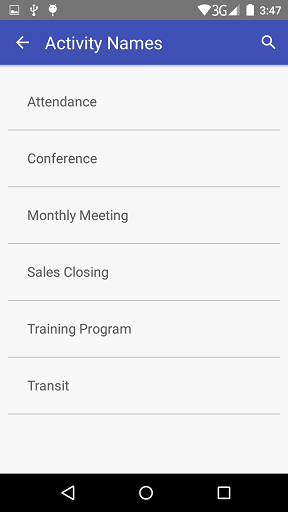
3 different activities will be displayed
Field RCPA
A screen with 6 different block will be displayed. An arrow in left top to go back to calendar screen
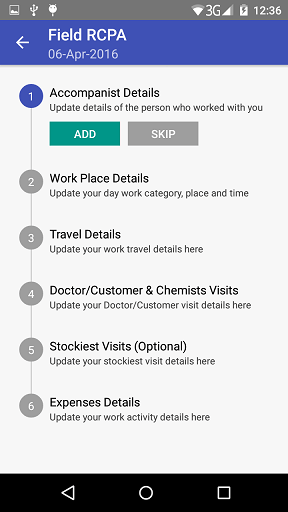
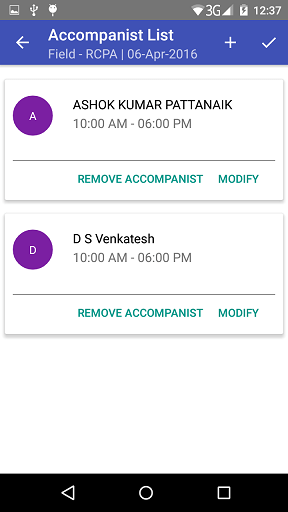
Block 1: Accompanist Details Section (Add/Skip)
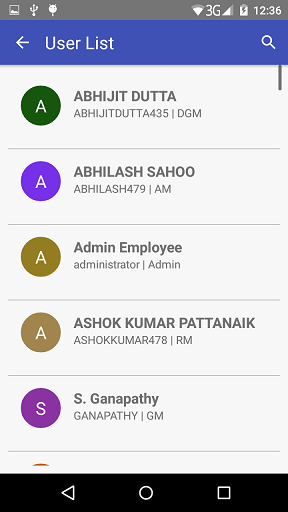
On click add button, accompanist selection will be loaded and list of accompanist can be selected from dropdown.
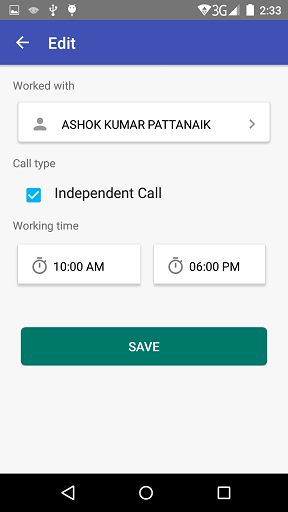
Selected accompanist will get autofilled in Worked With column, next is Call Type (Independent check). Accompanist worked time from & to time.
Add accompanist to add 2nd accompanist details.
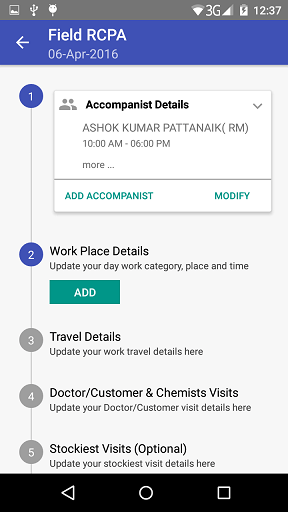
Modify option to edit the entered accompanist details.
In modify selection, remove option is available incase of wrong entry.
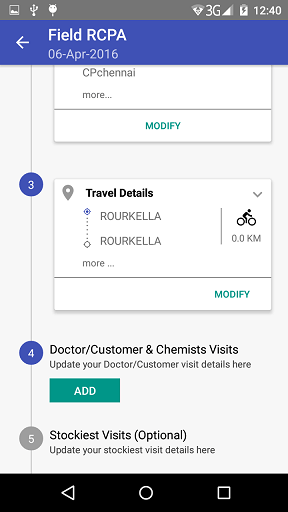
Block 2: Work Place Detail Grid (Add)
Campaign Plan grid will be loaded to select the campaigns.

Select Work Category
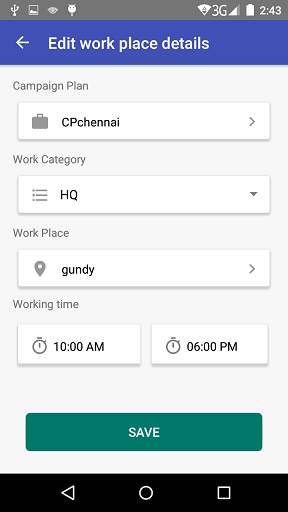
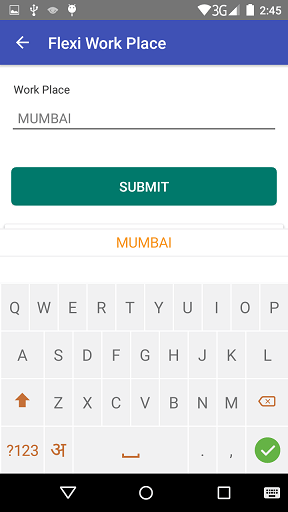
Select the work place (In work place + symbol to add Flexi Entry)
Working Time selection From & To
Block 3: Travel Details (Add/Modify)
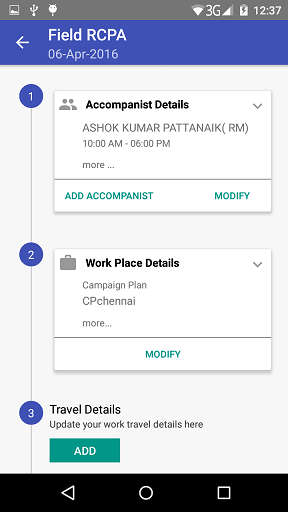
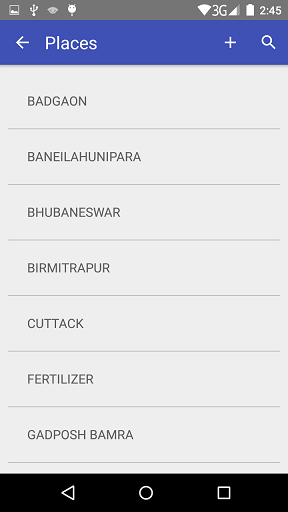
On click of add button, from and to Place grid will appear. Click on from place it will take to the SFC list. Search key for searching SFC list (Both from place & to place + symbol to be given to enter flexi routes.
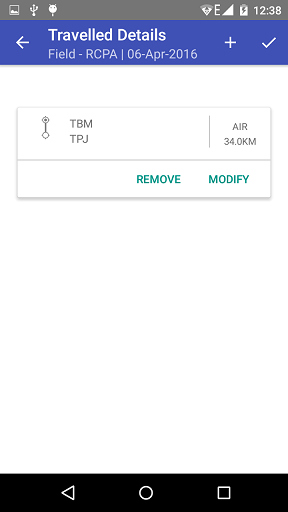
Once the combination is selected, auto populate the work place based on selected routes.
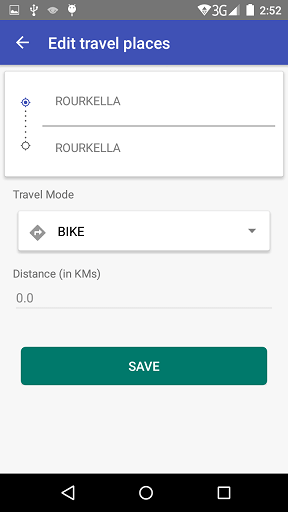
Modify section will bring all combination in on window from which each SFC combination can be deleted or modified.
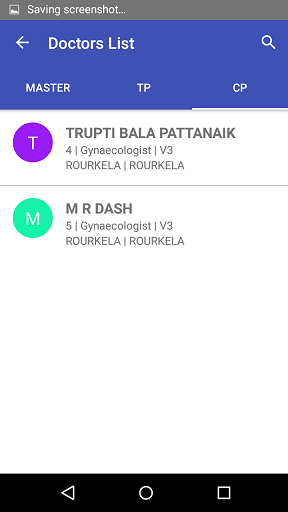
Block 4: Doctor/Customers & Chemist Visit Grid (Add)
On Add, list of approved doctors will be shown in New Doctor Grid.
In which easy search option should be there. It will be sorted alphabetical order. After selection of doctor a new grid with 5 blocks will get loaded. On top of the grid the selected doctor basic information like (MDL No. , Speciality, Category, Local Area, Address 1 and selected Doctor Visit Date)
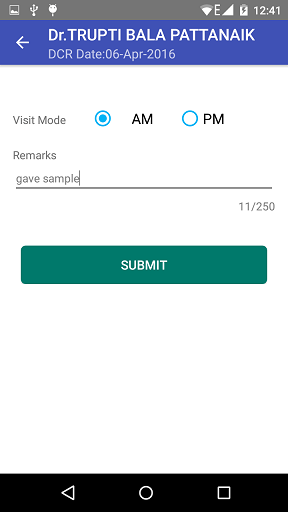
Sub Block 1: Doctor Visit Details (Add)
In this section, 3 columns will be there. First one is the visit time, POB Amount & at last Remarks(Max of 250 Character)
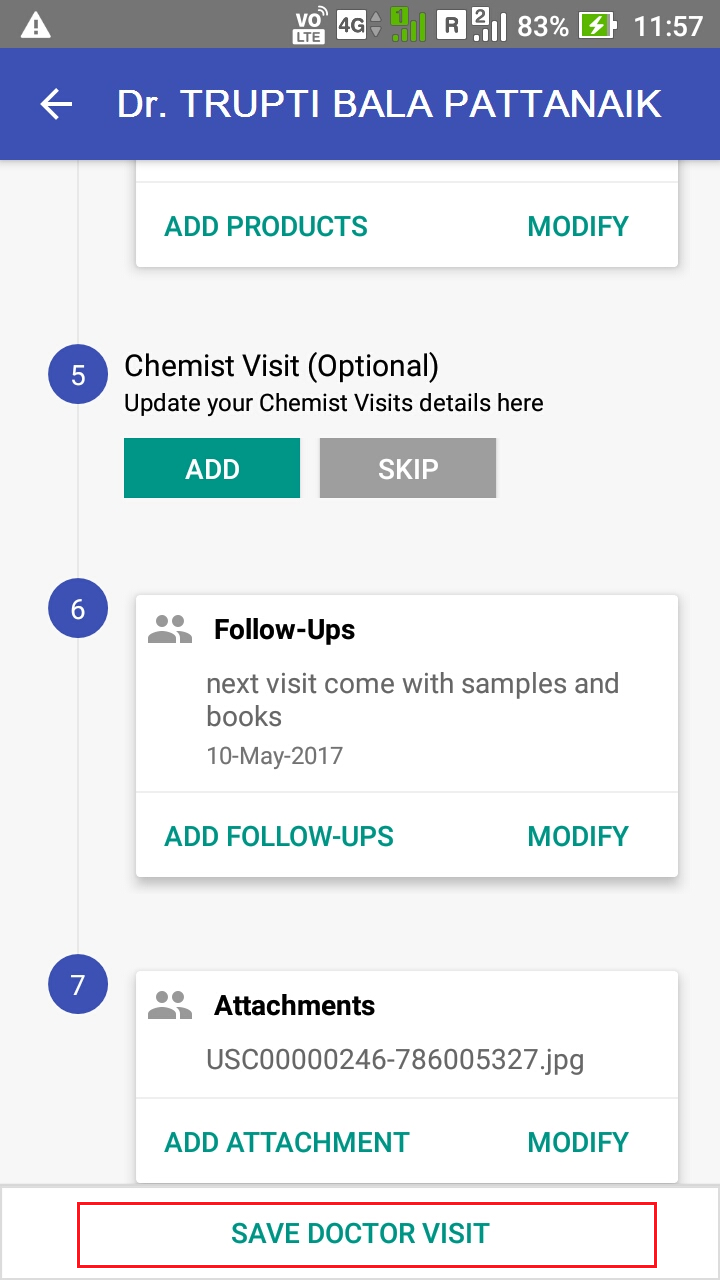
Sub Block 2: Purchase Order Booking (Add/Skip)
This section will show how to enter POB for a stockist pretaining to the customer visit.
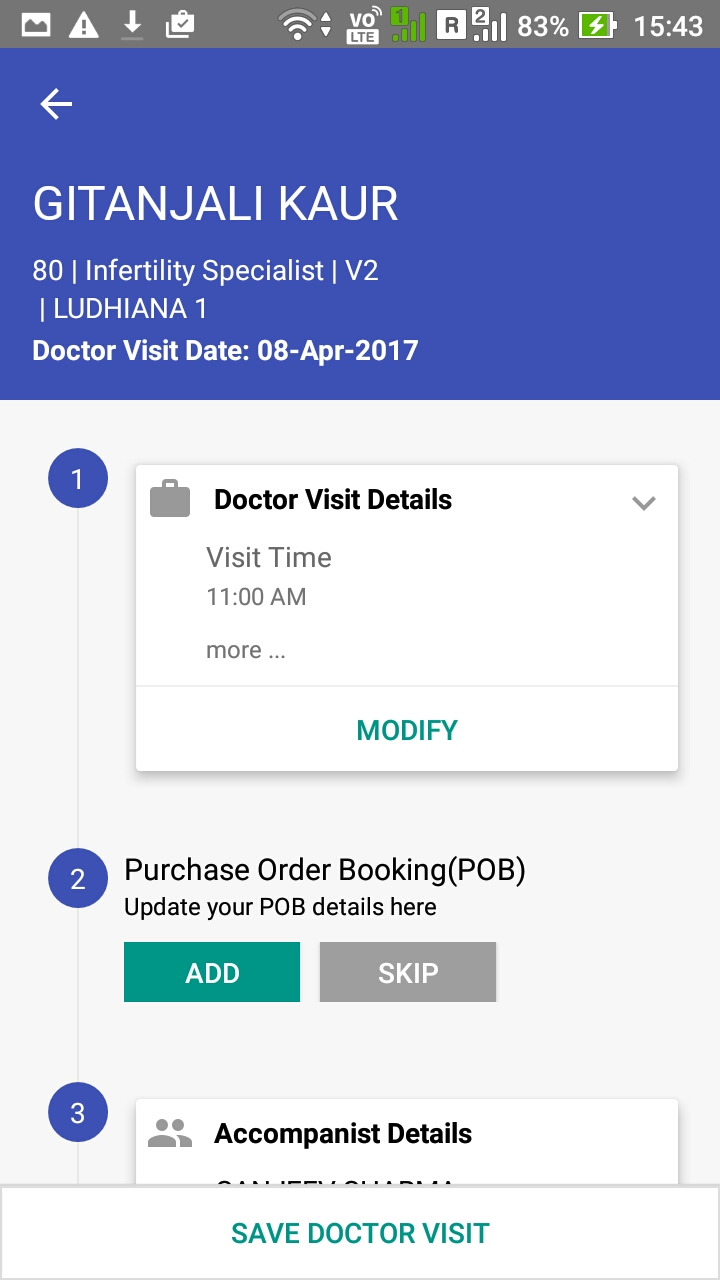
Each POB entry contains 4 steps to fill.
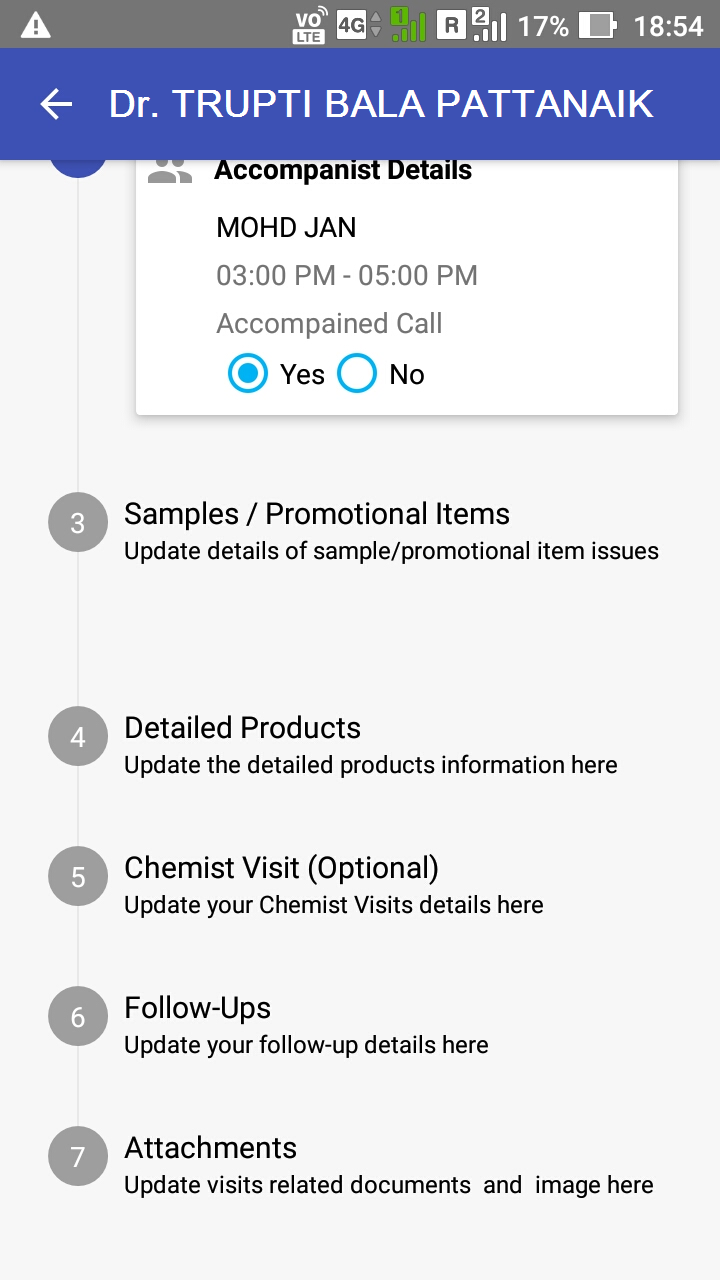
Sub Block 3: Accompanist Details (Add/Skip)
This section will show the list of accompanist, which got added on block 1.
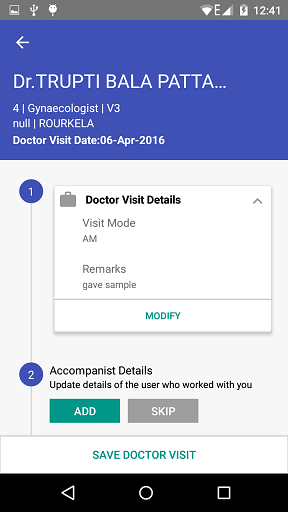
Finally after entering all the necessary information regarding doctor, click on save doctor visits to come back to the Field RCPA grid.
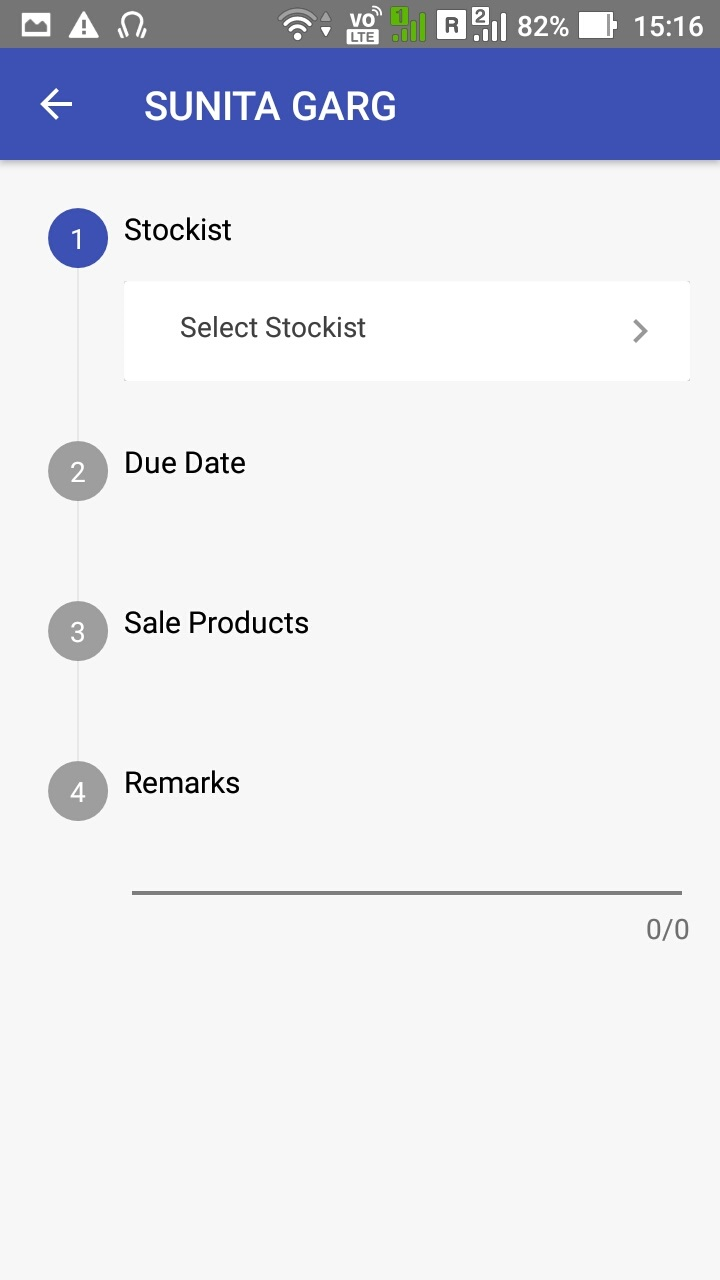
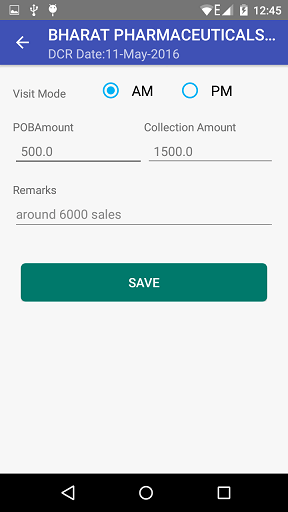
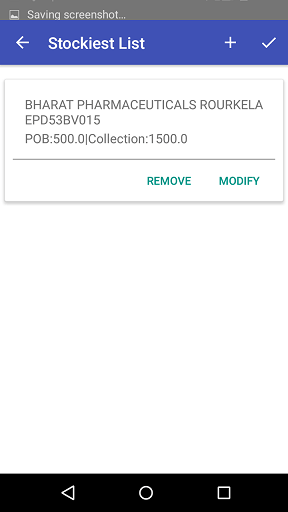
Block 5: Stockiest Details (Add)
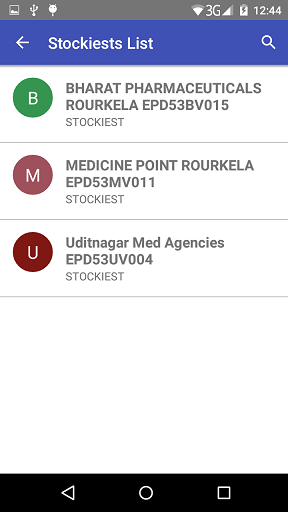
On Add, list of approved Stockiest will be shown. In which search option should be given to find the stockiest. After selecting the stockiest lead to the next screen where stockiest visit time can be entered that is AM/PM. Next column is POB Amount, Collection Amount and finally remarks. With submit button.
Modify section should bring all combination in on window from which each Stockiest combination can be deleted or modified.
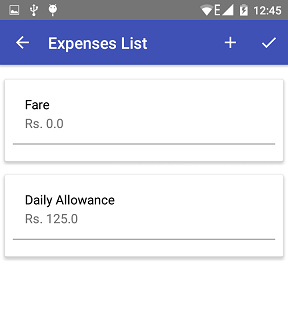
Block 6: Expense Details (Add)
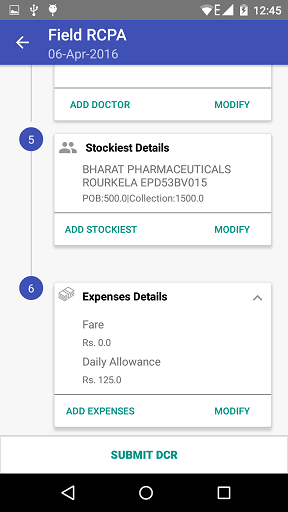
On Add, new window with expense name column from which dropdown selection of the expense types. Next column will be Amount and Remarks. As per system configuration if expense group is mapped, then automatically all the expenses will get pre-filled. If not flexi entry is also possible. All these control are based on privileges.
On click of Submit DCR a pop window will be shown immediately to upload the DCR or Later. On click on Upload, the screen will re-direct to Upload my DCR screen for uploading the Offline DCR.
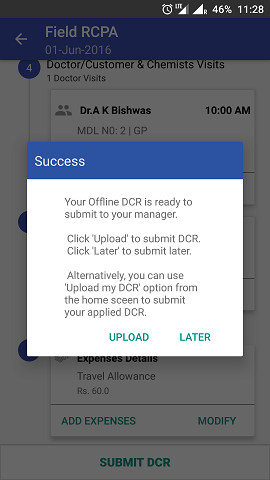
Press upload to sync the offline data to the server.
Attendance
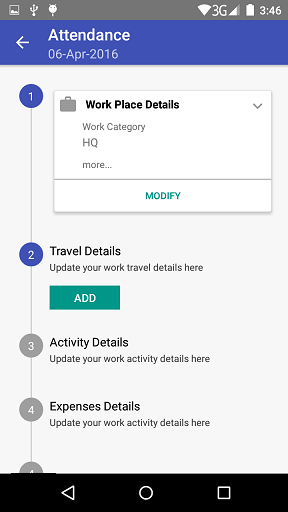
A window with 5 different block will be displayed. An arrow in left top to go back to calendar screen
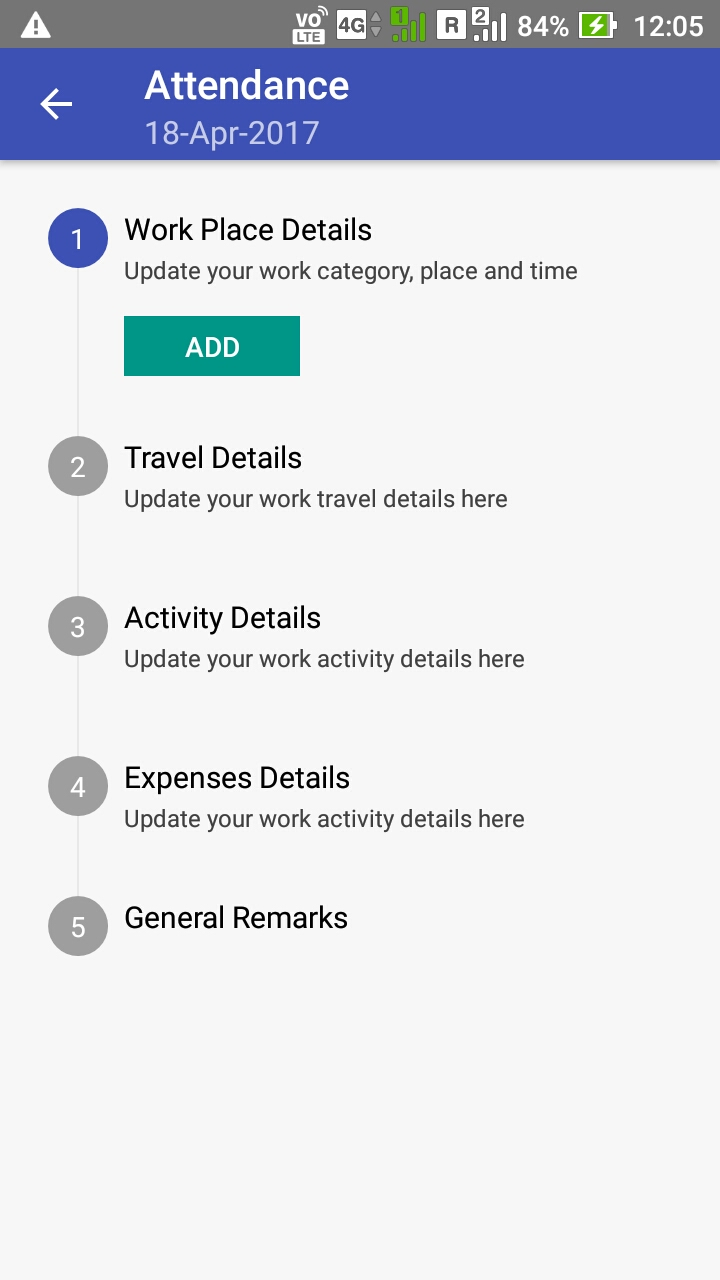
Block 1: Work Place Detail Grid (Add)
Select Work Category
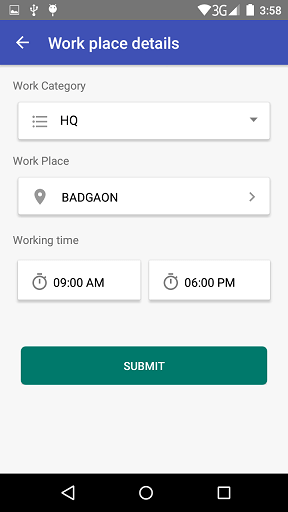
Select the work place (In work place + symbol to add Flexi Entry)
Working Time selection From & To
Block 2: Travel Details (Add/Modify)
On add, from and to Place grid will appear. Click on from place it will take to the SFC list. Search key for searching SFC list (Both from place & to place + symbol to be given to enter flexi routes.

Once the combination is selected, auto populate the work place based on selected routes.
Modify section should bring all combination in on window from which each SFC combination can be deleted or modified.
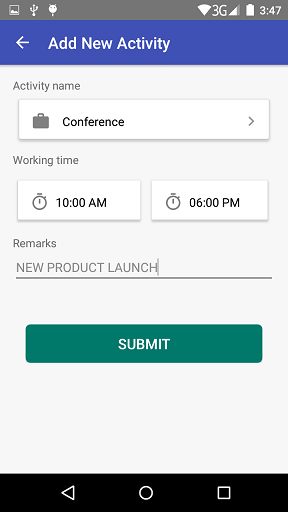
Block 3: Activity Details (Add/Modify)
On Add, new window with Activity Name column from which dropdown selection of the activity types.
Next column will be activity Start time, end time and remarks. Then submit button to save the activity details
Block 4: Expense Details (Add)
On Add, new window with expense name column from which dropdown selection of the expense types.
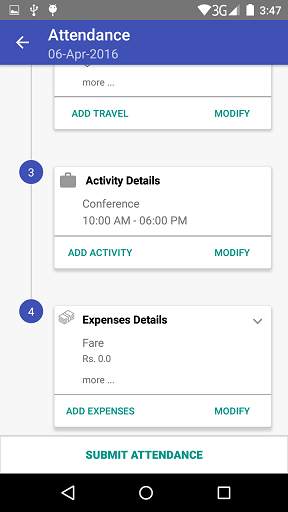
Next column will be Amount and Remarks. As per system configuration if expense group is mapped, then automatically all the expenses will get pre-filled. If not flexi entry is also possible. All these control are based on privileges.
After entering all DCR information click Submit
Leave
A window with entry columns to enter the leave details. An arrow in left top to go back to calendar screen
Block 1: Leave Entry (Add)
On Add, new window with From Date and To Date selection column.
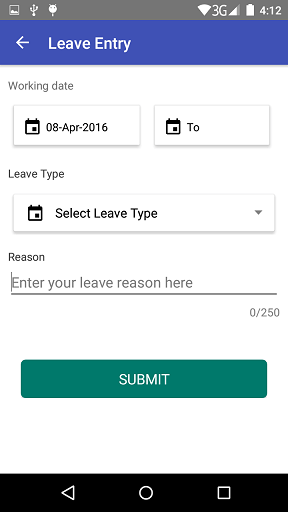
Next column is the Leave Type with dropdown of leave types.

Reason column with 250 character to enter the leave reason.
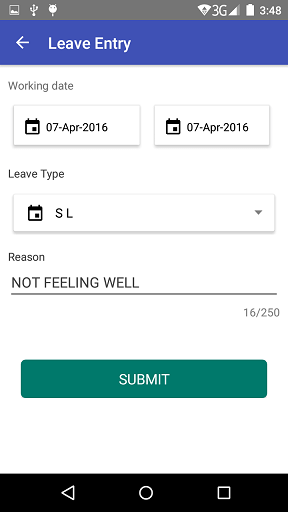
Submit button to save the leave entry.
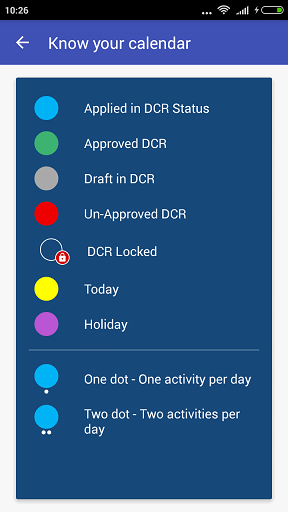
To know the calendar behaviour, there is a seperate link to view different color identification.
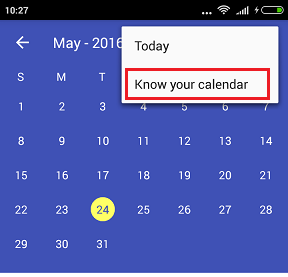
After clicking, a image will appear will all color code details and its reference.